2012-04-24

I am getting there! 
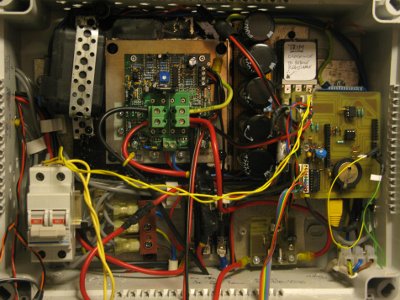
With a new LDR Controller in place (see photo on left), a proper Shield I have built for the Arduino Monitor, and wiring re-routed all I was waiting for was a new Immersion Heater. 
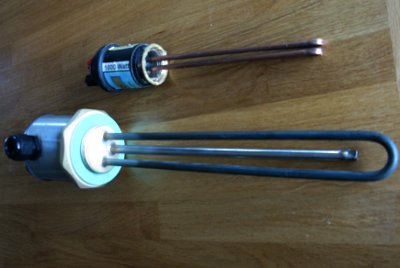
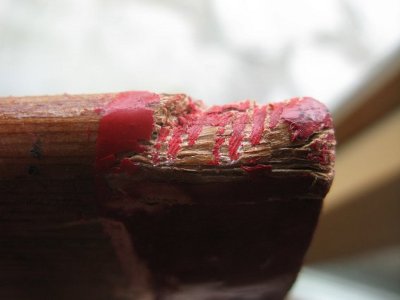
The new one arrived and the old one taken out. Nothing to see on inspection, but you can see the considerable difference in quality between these two items. The new one is the bigger heater fitting flush inside the tank, unlike the other one which is smaller, has very tight bends, and is not flush with tank, so I think would risk overheating. A possible cause for it's failure. 
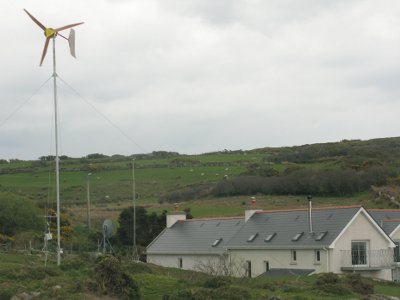
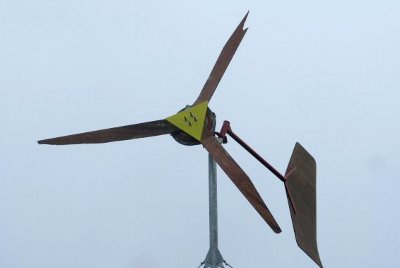
29th April 2012 The turbine has been running all day in winds from 5 - 35 knots. It is producing about 1kW when wind is above 20knts, so doing really well...... Watch this space!

2012-04-04

Yet another challenge! Susy heard a big bang and smell of burning from our plant room this morning at 0745 UTC. On inspection it turned out that the Load Controller for the Wind Turbine had blown a fuse, and fried a varistor on the LDR 48-30 controller board. The rather charred result is seen in the pictures left and right. On Hugh Piggott's advice I checked for an earth problem and discovered to my horror that the Immersion +ve was conducting to earth. Must be a fault in the Immersion as the root cause of the problem. So I need a new LDR (unfortunately it did not work!) and I need to investigate the immersion further. Will I ever get this thing to work for more than a few days at a time? It was certainly pushing a good 1000 Watts into the tank with 20-30knots of breeze, so working above spec. Great!

2012-04-01

On the left is the turbine in place on the top of the mast with the tail supported on the back of the quad bike. My friend Michael and I were able to get the turbine erected between us very easily in the end. And finally on the right the turbine can be seen working in only 5 knots of breeze. Not enough to produce energy, it needs nearer 8 knots to do that, but it does start turning at this wind speed. I have just got to get the circuit for monitoring the Amps calibrated, and then see how much power we are getting out of it. More on this when I have it sorted.

2012-04-01

At last I have the three new blades carved, balanced and painted up. The Hydraulic Ram has been moved under the mast. I discovered that pushing is more efficient than pulling, and it proved correct. Using my compact tractor and a light push up on the mast up it went. The ram can be seen on the right, however, because it would not extend to raise the mast through 90 degrees, I put a rope with a 2:1 purchase on the upper wire guy rope to pull it up the last 20 degrees or so by hand, which proved to be very easy to do. Magic!

2012-03-22

Disaster Strikes!...... On getting up today the turbine could be seen to be vibrating badly. I thought the balance weight had fallen off, but on stopping the machine I could see two of the blades had broken overnight. The maximum wind had only been about 12 knots. I found the tip of one blade which revealed the problem (see closeup photo on the right). The blades had hit one of the wires. I know they are close, but not that close! They must have flexed somehow to hit a wire. I will have to take it all down, extend the mast a little and make two new blades. Watch this space.........

2012-03-19

The blades were attached and we were ready to hoist. Unfortunately my tractor refused to lift the mast with the weight of the turbine on the top. We managed to get a neighbour with a bigger tractor to come over (Many thanks indeed to Doni and Michael), but the bigger tractor would not lift it either! We resorted to the tractor and man power, and up it went! The cables were connected, and having tightened up the guy wires, we switched the brake off and away it went. In around 10+ knots of breeze it is producing over 250 watts. Not bad! The software for monitoring the output is working, but does need some tweeking, so nothing ready to go up on the net yet.

2012-03-19

The mast base is in place, and mast is back from galvanizing, so was fitted on 18th and all the wire guy ropes set up. It was an easy job with the hydraulic ram to raise and lower the mast using my compact tractor. On the 19th the turbine was placed on the top with the cables running down the mast as can be seen on the right here.

2012-02-19

Wooden shuttering in place for the concrete base has metal reinforcing drilled into the rock to hold the mast nice and steady. On the right is the mast undergoing testing in the yard up at the forge. I am using a hydrolic ram to raise and lower it powered by the tractor. We tested the mast with JJ who weighs 75kg hanging on the top, and it went up with no problem. The mast will be galvanised and have wire guy ropes for support.

2012-02-21

Now for the ground work. Fortunately I was able to find a position about 30 metres from the house where a concrete base could be made for the mast, and the fixings for the wire guy ropes could be put directly into the rock. On the left is the site looking west across Dunmannus Bay into the Atlantic Ocean. It should be windy enough! On the right Dan is busy getting the levels correct using a laser gismo.

2012-02-21

Holes are drilled into the rock for the guy wires. Mike is busy squirting the Chemical Fixing prior to knocking the metal loops into place.

Pages