Here is how I installed a basic Debian Server for Eumetcast Reception.
Download the netinst iso from the Debian website and burn a CD.
Boot the PC using the CD and select the Advanced Options -> Expert Install for maximum control.
I selected the Language as English - United Kingdom - United Kingdom en_GB.UTF_8 - and no additional locales.
Then the Keyboard as British English
Detect and Mount CD Rom - make sure USB is selected
Load Installer Components from CD
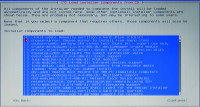
I selected only the first two options cfdisk-udeb and choose-mirror by moving the cursor up and down using the up and down arrow keys, and press the Spacebar to select or deselect the item.
After a few moments
Detect Network Hardware
I selected the default using DHCP
Hostname - here you need to type in the hostname you want to use for this computer, followed by a domain name (depends on you home network what goes here. probably nothing.
Choose a mirror of the Debian Archive - I selected http then select a country nearest to you which will probably be the quickest. I have no proxy so left that blank.
Setup users and passwords - Enable shadow passwords - answer no to allow root login so sudo is enabled for the main user - Enter username and password.
Configure the Clock - I selected set using ntp and gave the address of my home ntp server (a Raspberry Pi using the GPS board as per David Taylor's Setup) but the default ntp server will do. I then selected UTC as the time zone.
Detect Discs
Partiton Discs - The simple way is to choose the first option Guided use entire disc. I see no need to use LVM (Logical Volume Manager) because it is very unlikely you will want to add discs in the future, and encryption seems unnecessary to me as well. If you want, and you know how, you can use the manual option and partition the disc yourself. You might as well have the whole lot on one partition, or set /home as a separate partition which is what I did. Finish partitioning and write changes to disc if you are happy, that is!
Install Base System
You can go and make a quick cup of coffee whilst the files are loaded onto the disc. Then you will be asked for the kernel to install. I would suggest the default linux-image-686-pae. Then the initrd choice. To be safe chose the default all drivers, but I selected the second one for a smaller initrd. IMHO it does not really matter. the initrd is loaded into ram and is used as the computer boots to load the essential drivers and kernel.
Configure the Package Manager - select the default to supplement the software from a mirror and the following several defaults to select the previously selected mirror. I continued with the defaults by answering no to suggested repositories for non-free and contrib software. We only need a very bare system, after all. Then continue to select defaults for both software updates
Select and Install software - you will have to wait for the repositories to update.
Maybe go and get that biscuit you should have got when making coffee earlier....
Say no to (setuid man) (default anyway).
Only select 3 things in the additional software the 'File Server', 'SSH server', and 'Standard system utilities'. You do NOT need a desktop or any of the other servers.
The download should not take very long.
Install the GRUB Bootloader on a Hard Disc - Grub2 will be installed. the default should do here installing to the master boot record.
Finish the Installation - Set clock to UTC.
Reboot with CD removed of course!
You should now see your system boot happily into Debian with a login.
login using your username and password.
You should see something like this
username@hostname ~$
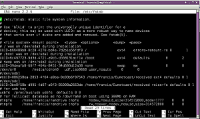
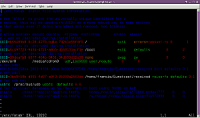
The default editor is nano. I like vim but it takes a bit of learning, so we will stick with nano. One of the reasons I like Vim is it is easy to turn on syntax highlighting. In Nano it is very tricky! here is a screenshot of the /etc/fstab file in Nano and Vim.
I know it is difficult to see the detail, but you can see the syntax highlighting makes it easier to read, and therefore less prone to error.
Firstly disable root login through ssh
sudo nano /etc/ssh/sshd_config
enter your password
change the line
PermitRootLogin yes
to
PermitRootLogin no
then save (Ctl-o) and exit (Ctl-x) which is hold Ctrl key down and press o (letter o not zero) and same to exit.
then generate keys
ssh-keygen
and hit enter key a few times to accept defaults (no passphrase)
Now to start ssh and make sure it is enabled at startup so you can work from another PC in comfort and have the benefit of copy and paste into a terminal for the rest of the setup.
sudo /etc/init.d/ssh start
and enable at startup
sudo update-rc.d ssh enable
Now to set the IP address of the machine NIC and the Ayecka SR1 NIC
sudo nano /etc/network/interfaces
here is mine
# /etc/network/interfaces
# This file describes the network interfaces available on your system
# and how to activate them. For more information, see interfaces(5).
# The loopback network interface
auto lo
iface lo inet loopback
# The primary network interface
allow-hotplug eth0
#iface eth0 inet dhcp
iface eth0 inet static
address <IP-ADDRESS-ON-YOUR-LAN>
netmask 255.255.255.0
gateway <IP-ADDRESS-OF-GATEWAY> #usually your router
#Eumetcast Network Interface
allow-hotplug eth1
iface eth1 inet static
address 192.168.10.103
netmask 255.255.255.0
gateway 0.0.0.0
#######################################
I also have a /etc/hosts file with the addresses of the computers on the network. I am sure you can sort that out.
Now reboot
sudo reboot
when it starts up login and type
sudo ip addr show
this will show your NICs and addresses which should match the interfaces file.
1: lo: < LOOPBACK,UP,LOWER_UP> mtu 16436 qdisc noqueue state UNKNOWN
    link/loopback 00:00:00:00:00:00 brd 00:00:00:00:00:00
    inet 127.0.0.1/8 scope host lo
    inet6 ::1/128 scope host
       valid_lft forever preferred_lft forever
2: eth0: <BROADCAST,MULTICAST,UP,LOWER_UP> mtu 1500 qdisc pfifo_fast state UP qlen 1000
    link/ether 00:03:1d:03:28:cb brd ff:ff:ff:ff:ff:ff
    inet <IP-ADDRESS-ON-YOUR-LAN>/24 brd < BASIC-IP-ADDRESS-ON-YOUR-LAN>.255 scope global eth0
       valid_lft forever preferred_lft forever
3: eth1: <BROADCAST,MULTICAST,UP,LOWER_UP> mtu 1500 qdisc pfifo_fast state UNKNOWN qlen 1000
    link/ether 00:19:5b:72:e5:8e brd ff:ff:ff:ff:ff:ff
    inet 192.168.10.103/24 brd 192.168.10.255 scope global eth1
    inet6 fe80::219:5bff:fe72:e58e/64 scope link
       valid_lft forever preferred_lft forever
you can now ssh into your machine by name or address from another computer. In Linux just open a terminal (I like 'Guake' as it pops down on hitting F12) or in Windows install 'Putty' and use that.
ssh USERNAME@HOSTNAME
enter password, and we are good to go.


