Receiving Eumetcast using Debian 7 in 90 mins
I have been a Linux user for many years. The more I use Windows, the less I like it. With Support for Windows XP finishing this April, and the new DVB S2 reception from Eumetcast coming I decided to start getting rid of Windows by receiving Eumetcast using Linux.
You do NOT need to be an expert in Linux to do this.
Now you may say 90 mins is a bit ambitious, but I did cheat a little. I got a working system up and running in a morning, but decided to start again, so there were no unnecessary programs installed or running on my nice clean Debian box. The fresh install with Eumetcast reception working did only take 90 mins the second time.
I began by looking at the Eumetcast CD. In the Linux directory there is a Readme_first.txt file which lists the supported Linux distros. I am not too familiar with Redhat, Fedora or OpenSuse, and not too keen on Ubuntu. Personally I mainly use Arch Linux and Gentoo Linux. I decided to use Debian Linux which is well known for it's stability, and I was pretty sure would work fine with the Eumetcast software. Debian is now at version 7 so to begin with I setup a very basic installation of Debian 7 using the small netinst image from the website.
In Debian 7 the current kernel version is 3.2, much newer than the 2.4 or 2.6 kernel in Debian 4, so is more likely to have the correct drivers for your motherboard.
My PC is a fairly old 32 bit Pentium M with a 1.7Mhz processor and 1Gb memory and a Gigabit Ethernet Controller on the motherboard connected to my LAN. I added a D-Link Gigabit Ethernet Controller into a PCI slot for the Traffic link to the Ayecka SR1 I had been fortunate to buy at the GEO Symposiom. More on this later. I have two hard drives installed, a small one 80Gb for the operating system and another 160Gb for the Eumetcast received data, which I do NOT plug in until I have the operating system working correctly to avoid accidently installing it on the wrong drive.
This is what I did to Install Debian.
Downloaded the netinst iso from the Debian website http://www.debian.org/distrib/ and burned a CD.
Booted the PC using the CD , and installed a basic system. The detail of this is here.
My description is not exhaustive. Most of it is very simple, requiring only common sense. You will be working from the command line which can be a bit scary to begin with, but gets easier in time, and very soon you will see the flexibility and power offered by Linux which cannot be matched by Windows.
Apart from the very basic installation I made sure during the install I had the following services installed:
-
'File Server' which is SAMBA for sharing on a Windows workgroup
-
'SSH server' to allow logging into the server from another computer using ssh fom a terminal in Linux or using Putty in Windows. In Linux you would type
ssh USERNAME@DEBIAN_MACHINE_ADDRESS_OR_HOSTNAME
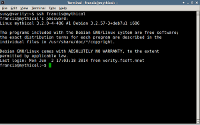
to log in from another computer. Here is an example logging into my Eumetcast machine using a Terminal from my wife's computer which is running Linux Mint.
-
'Standard system utilities' essential on any system.
After the install I also installed the following:
-
'Vim' the editor which I prefer to the default Nano editor. It is worth learning from the excellent tutorial included with the installation.
-
'Ssmtp' a simple mail daemon to allow the computer to mail information to you.
-
'Rsync' to enable syncronising directories both local and remote, and also good for copying files.
-
'Snmp' for monitoring of this machine using mrtg.
The Network for Ayecka SR1
The Ayecka SR1 is a router and is not installed in the PC. This is excellent! No need to worry about DVB drivers on the PC. The Ayecks SR1, in addition to it's USB/Serial port and 2 Rx ports, has 2 network interfaces, one for Management and one for Traffic. I have the Management interface plugged into my home network and the Traffic interface plugged directly into the D-Link NIC on my PC. You do not need to use a crossover cable, a normal Cat 6 patch cable will do the job. The beauty of this is that traffic can pass uninterupted to the PC, and any PC on the home network can interrogate the management interface.
The NICs on the PC are setup with static IP addresses. For more on this see my site on the Debian Install page.
Now for the Eumetcast bit.
First off you will need your second drive added and formatted. I will not show you how to do this, there is plenty of stuff on the net showing how to use fdisk. I have formated the disc using the reiserfs system because it is meant to be faster than the ext4 filesystem.
create a folder in your home folder
mkdir ~/Eumetcast/received
(In Linux the ~ signifies your home directory as in /home/USERNAME/
Then setup the mount in your /etc/fstab by editing the file and adding a line to add the mount points here is mine. Any line with a # at the front is ignored and can be used for comments.
#Mount point for received files
UUID=3be8f58b-d995-4d07-a9f3-85008a2663de /home/USERNAME/Eumetcast/received reiserfs defaults 0 1
You might as well add the usbfs as well whilst you are at it. This is needed by the EKU setup
# for usb key
usbfs /proc/bus/usb usbfs defaults 0 0
and save the file.
Now your UUID number will be different than mine. you find the UUID as follows
sudo ls -l /dev/disk/by-uuid
and you can copy and paste the long number relating to your partition mounted on /home/USERNAME/Eumetcast/received (it might be /dev/sdb1 ) into the correct place in your /etc/fstab file.
In Linux you can select text in the terminal with the mouse, hold down Shift-Ctl-C to copy text, then place the cursor in the place you want to paste the text and hold down Shift-Ctl-V. Very handy!
now reboot
ssh into the machine again
type
mount
and you should see all your mounts including the /home/USERNAME/Eumetcast/received
Now to setup the RAM Disk. Thanks to Ernst Lobsiger for this
Here is what he suggests >
The kernel boot parameters are only used if your ramdrive is compiled into the kernel. Nowadays this is usually loaded as a module and it's name has changed from rd to brd.
So I use the following line in /etc/modules to load an appropriate RAM drive:
brd rd_nr=1 rd_size=305000 max_part=0
In /etc/recv.ini I have a line:
file_database_size=300000000
That works fine even if in the startup scripts EUMETSAT still uses the name rd.
This next bit should be done after the Tellicast software is installed
When the partition is setup in the tellicast client script /etc/tellicast-client I changed line 149 to add "...... -m 0 ..." so it becomes
/sbin/mkfs -t ext2 -m 0 $RAM_DISK_DEVICE > /dev/null 2>&1
meaning I added "-m 0" to prevent a reservation of 5% root only blocks. If you do not add "-m 0" on your ramdisk 5% will be reserved for root only and if your tc-recv is running as another user than root these reserved blocks will not be accessible for the client and thus be wasted.
>>>>>>
Create directory to mount ramdrive
mkdir ~/ramdrive
you will need to specify this in your recv.ini file for tellicast to mount
Now for File Sharing
SAMBA is used to share the received files across a windows network so David Taylor's software can reach it. Samba is already installed. Edit the config file to share the received files /etc/samba/smb.conf
sudo nano /etc/samba/smb.conf
edit line in [global] section
workgroup = <YOUR_WORKGROUP>
and create a share adding this
[Eumetcast]
comment = Eumetcast Directories
path=/home/USERNAME/Eumetcast
guest ok = yes
browseable = yes
create mask = 0777
directory mask = 0777
force create mode = 777
force directory mode = 777
force security mode = 777
force directory
security mode = 777
read only = no
writable = yes
then start samba
sudo /etc/init.d/samba start
and at bootup
sudo update-rc.d samba enable
then check from a windows machine that you can read and write the share
OK back to the Eumetcast CD
Put it in the CD drive of the receive machine and mount it.
type
sudo mkdir /mnt/cdrom
sudo mount /dev/sr0 /mnt/cdrom
now
mkdir ~/EumetsatCD
This is where 'rsync', which you installed earlier, comes in handy.
copy cd files to ~/EumetsatCD
rsync -avr /mnt/cdrom/Linux ~/EumetsatCD/
the files and folders for a Linux install will be copied onto the PC from the Eumetcast CD.
unmount CD and eject
sudo umount /mnt/cdrom
sudo eject /dev/sr0
then move CD to computer you are sshing from and open the Linux/readme_Installation.txt file. I ignored the DVB section going straight to section 2. Install the EKU support because I am using the Ayecka SR1 router.
Now for the EKU software
You can read the Readme_debian_ubuntu.txt file in the Linux/EKU_software folder and follow the instructions. The commands need to be run as the root user, so to save having to type sudo in front of everything, type
sudo -i
enter your password and you will have a root prompt easily recognised as a # rather than a $ sign.
This is where copy and paste comes in handy. You can copy a command from the readme file and go to the terminal and paste it using Shift-Ctl-V.
Now you need to follow the instructions in the Troubleshooting guide which is in the Generic Folder to fix a couple of problems.
-
(C9) EKU / USB Problems with new Linux distributions
edit /etc/udev/rules.d/20-etoken.rules and add the following 2 lines:
ACTION=="add", SUBSYSTEM=="usb", SYSFS{idVendor}=="0529", SYSFS{idProduct}=="0514", RUN="/etc/hotplug/usb/etoken"
ACTION=="remove", SUBSYSTEM=="usb", SYSFS{idVendor}=="0529", SYSFS{idProduct}=="0514", RUN="/etc/hotplug/usb/etoken"
However the syntax is incorrect for Debian 7 these lines should read
ACTION=="add", SUBSYSTEM=="usb", ATTR{idVendor}=="0529", ATTR{idProduct}=="0514", RUN="/etc/hotplug/usb/etoken"
ACTION=="remove", SUBSYSTEM=="usb", ATTR{idVendor}=="0529", ATTR{idProduct}=="0514", RUN="/etc/hotplug/usb/etoken"
-
(C11) Missing symbolic link for etoken libraries
this file /usr/local/lib/aksifdh.so should be present on the system. Type
ls /usr/local/lib/aksifdh.so
to see if it is. If not (most likely) you need the link created, so type
ln -sf /usr/local/lib/aksifdh.so.1.3-15.84 /usr/local/lib/aksifdh.so
to create the soft link.
Then run ldconfig to be on the safe side
ldconfig
then reboot the station.
Now for the Tellicast Software
Look at the Readme_Tellicast_Linux.txt in the Linux/Tellicast folder. Goto section 2a and install the package. You will need to be the root user still.
Then you will need to modify the /etc/tellicast-client script to add Ernst's little fix as above.
The contents of the /etc/recv.ini and recv-channels.ini will need to be set according to your own needs. There is plenty about this on David Taylor's site. I have also found Arne van Belle, Rob Alblas and Ernst Lobsiger's sites extremely informative and well worth a visit.
I use the /etc/rc.local file to start the services to make sure they start in the correct order. Add these lines to the file BEFORE exit 0
/etc/init.d/etokend start
/etc/init.d/pcscd start
/etc/init.d/tellicast-client start
and issue these commands
update-rc.d etokend disable
update-rc.d pcscd disable
update-rc.d tellicast-client disable
to remove the scripts from the bootup
With the EKU plugged in you can monitor your Telicast from any browser on the network using http://IPADDRESS_DEBIAN_MACHINE:2517 and look at the license page to see if you have this
host_key_4: ****-****-****-****
Over on the right side of the page.
I would hope by now you have a trouble free working system.

